August 1, 2026
How to Get Your Dog to Look at the Camera: 10 Photography Tips
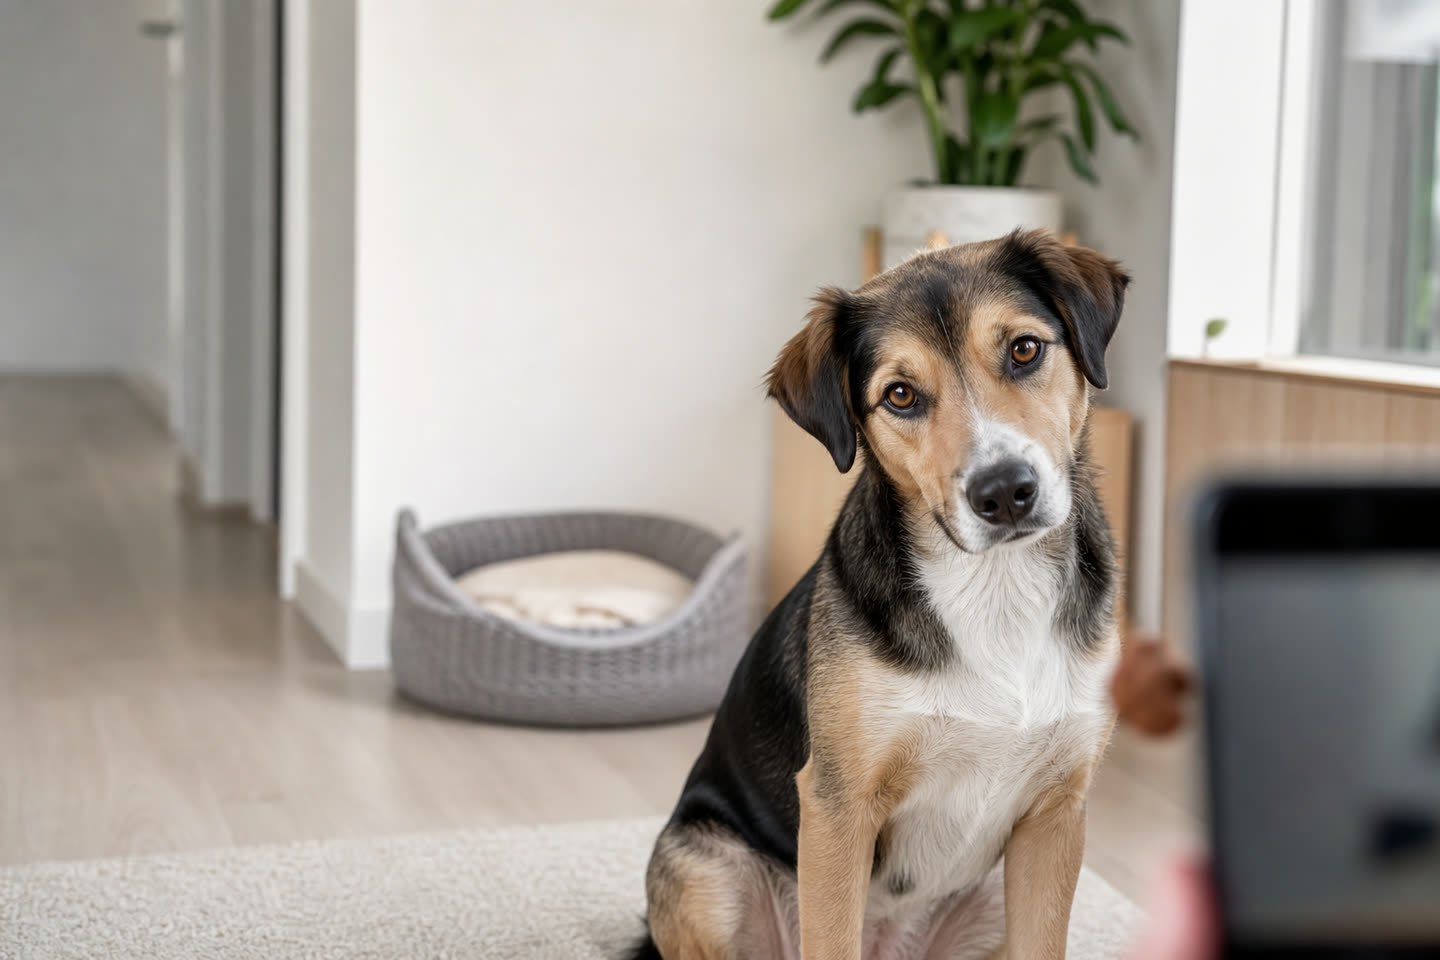
The moment your phone comes out, your dog looks away, walks towards you or becomes fascinated by something outside the frame. Getting a natural photo is rarely about forcing perfect stillness. It is about making the camera predictable, rewarding the right glance and working at your dog’s pace.
This practical guide explains how to get your dog to look at the camera, how a dog selfie stick or pet selfie tool works, which phone settings help and how to keep a short photo session comfortable rather than frustrating.
Why will my dog not look at the camera?
A phone is not automatically meaningful to a dog. The interesting information is usually beside it: your face, moving hands, a sound in the room or the possibility of a treat. When you lift a phone directly in front of your face, the familiar social picture changes. Some dogs approach to investigate; others look away because close, direct attention feels uncomfortable.
The camera can also predict things your dog dislikes. Repeatedly saying “stay,” physically repositioning paws or extending a session after the dog has finished may teach avoidance. Start again with a simpler goal: one relaxed glance towards the lens, followed by a reward and a break.
How to teach a dog to look at the camera
1. Prepare before inviting your dog
Clean the lens, choose the camera mode, clear visual clutter and place rewards within reach before bringing the dog into position. Preparation keeps the actual session short. Use a quiet, familiar area with non-slip footing and soft natural light.
2. Begin without taking photographs
Hold the phone below your face, mark a brief glance with a word such as “yes” and deliver a small reward. Repeat only a few times. Your dog is learning that looking towards the phone is safe and worthwhile.
3. Move the reward beside the lens
Bring a treat or favourite toy close to the camera without blocking it. Reward the glance before asking for longer attention. The aim is not to hypnotise the dog with food; it is to make the position of the desired gaze clear.
4. Add a simple cue
When the dog is reliably looking, say a short cue such as “camera” immediately before presenting the lens-side target. Over time, pause briefly after the cue so the dog has an opportunity to respond before the target appears.
5. Introduce the shutter sound
Take one photograph, reward and lower the phone. If the sound or screen movement causes concern, silence optional camera sounds where legal and practise from farther away. Never use flash close to your dog’s eyes.
6. Build duration slowly
A fraction of a second is enough for a sharp photograph. Increase attention in tiny steps rather than repeatedly asking the dog to hold position. Modern phones can capture several frames quickly, allowing you to reward a brief successful glance.
What is a dog selfie stick?
The term can describe several different accessories. Some are action-camera poles used while walking, but the product people usually mean when searching for a selfie stick for dogs is a small phone attachment that holds a treat or toy close to the camera lens.
A pet selfie tool helps align the dog’s gaze with the camera. It does not take the photograph, train a stay or guarantee that every dog will be interested. Its value is practical: it leaves one hand freer and keeps the visual target close to the lens instead of several centimetres to one side.
How to use a pet selfie tool
- Attach it securely. Confirm that the phone clip is stable and does not cover the lens, buttons or screen controls.
- Choose a safe target. Use a small dry treat or lightweight toy the clip can hold without slipping.
- Let your dog inspect it first. Present the unattached accessory calmly and reward neutral investigation.
- Keep the phone at a comfortable distance. Avoid pushing the device into the dog’s face.
- Capture the first good glance. Take the photograph before excitement turns into jumping or grabbing.
- Deliver the promised reward. Remove the treat from the clip and give it to the dog rather than teasing repeatedly.
- Put the accessory away. It is a photography aid, not a chew toy.
10 dog photography tips for better phone pictures
Use window light
Position the dog facing or at a slight angle to a large window. Soft indirect light reveals eye detail and coat texture without the harsh shadows produced by an overhead room light. Avoid placing the brightest window directly behind the dog unless the phone can expose the face correctly.
Photograph at eye level
Lowering the phone to the dog’s height creates a more connected portrait and reduces distortion. Sit or kneel safely rather than bending over the dog. For very small dogs, a secure floor-level composition is safer than placing them on high furniture.
Use portrait mode selectively
Portrait mode can separate the dog from the background, but software sometimes blurs ear tips, whiskers and long fur incorrectly. Take a standard photograph as well so you have a natural alternative.
Tap the nearest eye to focus
For a portrait, the eye closest to the camera should normally be sharp. Tap that area on the screen and reduce exposure slightly if pale fur or a bright background is losing detail.
Use burst or live-photo features
A short burst can capture the instant both ears settle or the mouth closes naturally. Do not hold the shutter indefinitely. A few intentional frames are easier to review and keep the session calmer.
Leave room around the dog
Avoid cutting through paws, ears or the end of the tail accidentally. Step back slightly and crop later. Leave extra space in the direction the dog is looking to make the composition feel balanced.
Choose a simple background
Move bags, cables and bright household objects out of frame. A clean background does not need to be empty; it should support the dog rather than compete with the face.
Reward natural expressions
Some dogs look relaxed with a slightly open mouth, while others naturally hold their ears asymmetrically. Do not chase a generic social-media expression. Photographs feel more personal when they reflect the individual dog.
Take movement photos outdoors safely
Use a secure enclosed area or keep the lead attached. Ask another adult to handle the dog rather than attempting to photograph and manage road or recall safety simultaneously.
Finish while it is still enjoyable
Two successful minutes are better than twenty minutes of repeated correction. End after a good frame, offer a normal activity and try another day if you need a different composition.
Signs your dog needs a break
Stop when your dog repeatedly turns away, lowers the body, pins the ears, licks the lips, yawns outside a tired context, pants when the room is cool, leaves the setup or will not take a normally valued treat. These signals can indicate discomfort or rising stress.
Do not restrain the dog in position, make sudden noises beside the ears or repeatedly squeak a toy without allowing access. The best photograph is not worth teaching your dog that cameras predict pressure.
Can the same technique work for cats?
Yes, but cats often respond better to movement than to stationary food. A lightweight feather or toy moved briefly beside the lens may create a natural glance. Let the cat choose the location, avoid lifting or repositioning repeatedly and keep food rewards appropriate to the normal daily intake.
Never use dangling string unsupervised, and put every small attachment away after the photograph. A cat that leaves has ended the session.
Common dog photography mistakes
- Calling the dog’s name repeatedly until it loses meaning.
- Holding the treat far above the lens, which makes the dog look noticeably upward.
- Using flash or a bright continuous light close to the eyes.
- Photographing on slippery flooring or unstable furniture.
- Moving the phone too close with a wide-angle lens, which exaggerates the nose.
- Teasing with food without delivering the reward.
- Continuing after the dog disengages.
Frequently asked questions
What can I use to make my dog look at the camera?
Use a small treat, a familiar lightweight toy or a previously trained camera cue. Position the target beside the lens and reward the glance. Avoid startling noises, particularly close to the ears.
Do dog selfie sticks really work?
A phone-mounted treat or toy holder can make gaze direction easier because the target sits near the lens. Results still depend on the dog’s interest, comfort and training. It should be introduced gradually rather than clipped on immediately and pushed towards the face.
How do I take a selfie with my dog?
Sit beside the dog instead of pulling the dog into an embrace. Hold the phone slightly above eye level, use the front-camera timer or voice shutter and place the visual target close to the lens. Reward one successful glance and release the dog.
Why does my dog look away when I point a phone at them?
The phone may hide your facial signals, feel too close or predict an uncomfortable interaction. Increase distance, lower the phone, reward voluntary glances and keep sessions brief.
Should I use treats for every photograph?
Not necessarily. Toys, a trained cue and natural attention can also work. If you use food, choose very small pieces and count them within the dog’s normal daily allowance.
Use an attention target without forcing eye contact
Hold a familiar toy, a quiet sound cue or a tiny piece of the dog’s normal food close to the lens. Reward brief voluntary glances and keep sessions short. If the dog turns away, licks their lips, lowers their body or leaves, pause rather than repeatedly calling them back.
A second person can position the target while the photographer keeps both hands steady. Outdoors, begin in a quiet place before attempting photographs around people, dogs or traffic.
A relaxed expression is more valuable than forced eye contact. Work at your pet’s pace and stop whenever the session no longer appears comfortable.